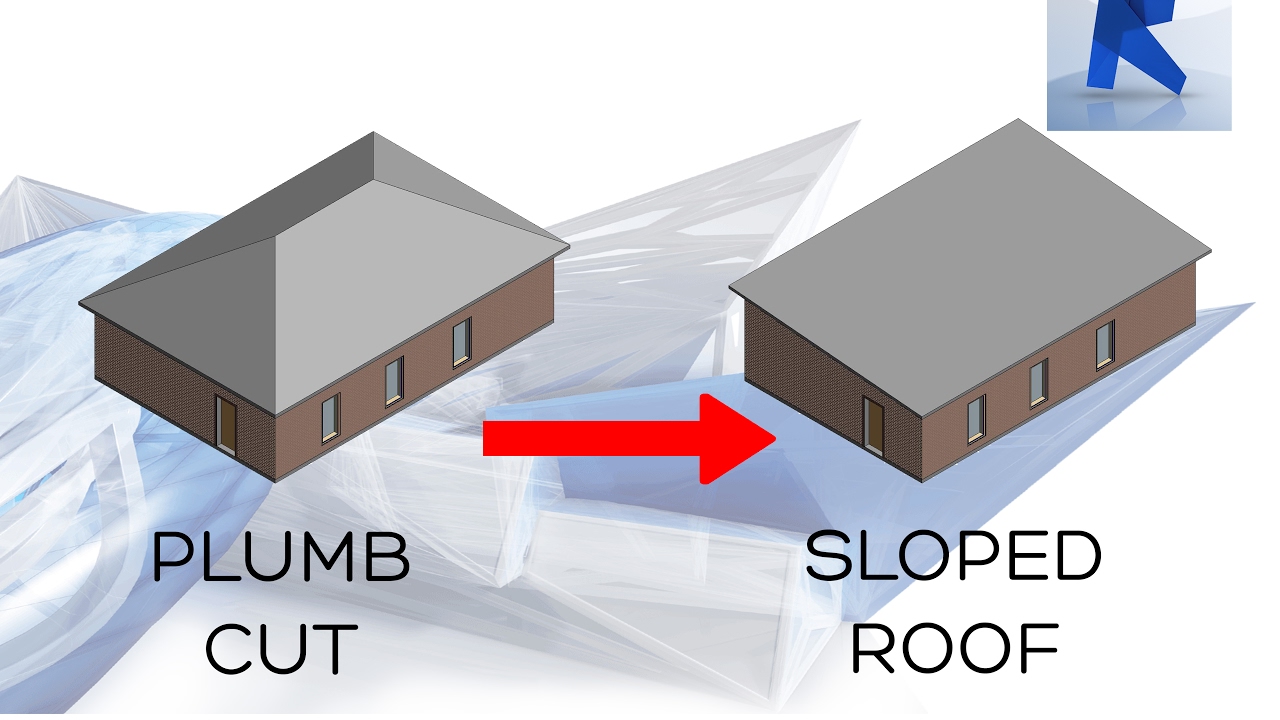
Make A Two Slope Roof Revit

Revit Roof Basics 10 Slope Arrow Cadclips Youtube
Revit 2017 Sloped Roof Create A Sloped Roof Easy Youtube

Revit Tutorials Roofs Youtube

Revit Roof Tip 2 Activate Slope To Create Sloped Roof Youtube

9 Tips To Understand Revit Roofs Revit Pure
.png)
Solved Roof That Slopes In 2 Directions Autodesk Community Revit Products

You can use any.
Make a two slope roof revit.

8 Tips To Create Sloped Roofs In Revit Revit Pure Roofing Glass Roof Roof Shapes

Revit Roof Basics 04 Intersect By Roof Join Cadclips Youtube

Split Gable Roof Autodesk Community Revit Products

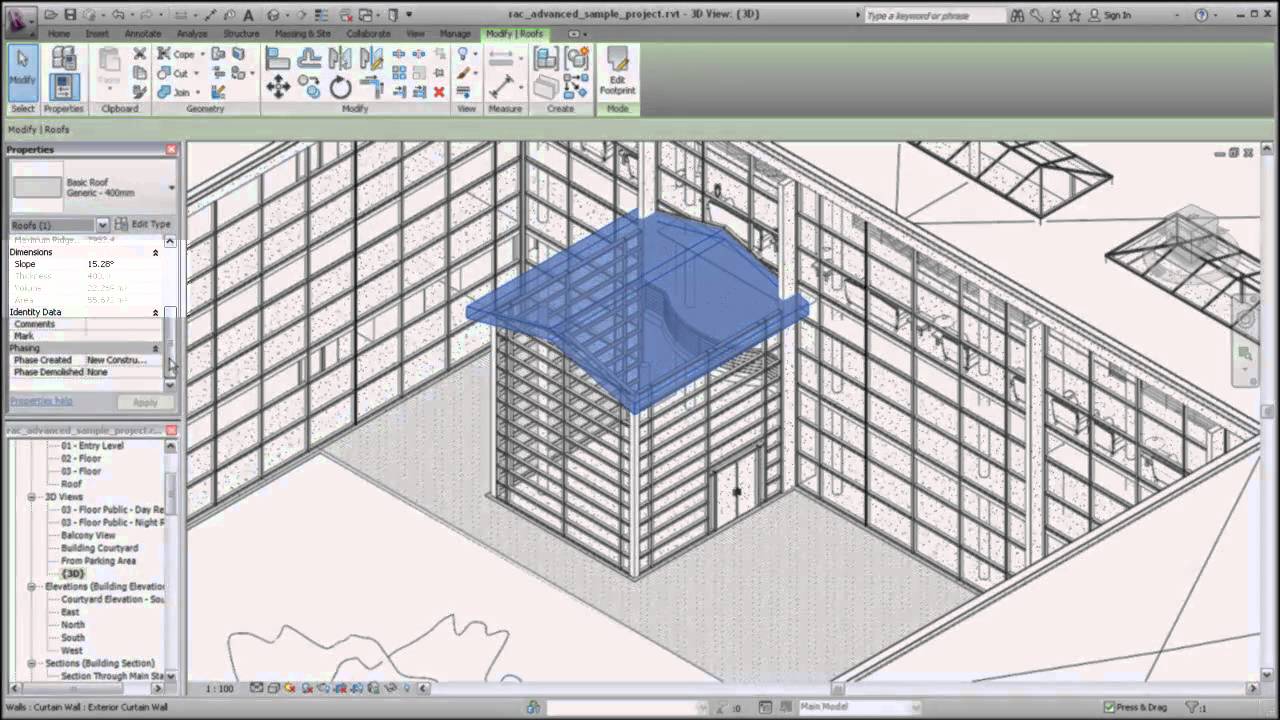
Solved Slope On Roof Created On Mass Face Autodesk Community Revit Products

Roof Cutoff Level Youtube
Autodesk Revit Architecture Creating A Sloped Roof Youtube

Adding A Roof In Revit Youtube
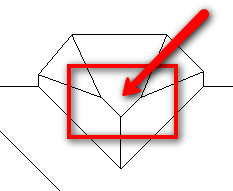
Varying Slope Hipped Roof

Solved Roof Cutoff Not Cutting Off Autodesk Community Revit Products

Revit Roof Tip 9 Join Roofs Add Opening To Create Dormer Youtube

A Hip Roof In Revit Architecture Youtube

Creating Sloped Beam In Revit Revit Lt Youtube

Create A Roof Slope Using Slope Arrows Revit Products 2018 Autodesk Knowledge Network

Create Parts From Roof Bug Autodesk Community Revit Products
Video Shape Editing Roof And Floor Slabs Revit Products 2018 Autodesk Knowledge Network

Solved Best Practice For Tapered Roof Or Floor Autodesk Community Revit Products

Creating Complex Roof In Revit Architecture Hip Roofs Youtube

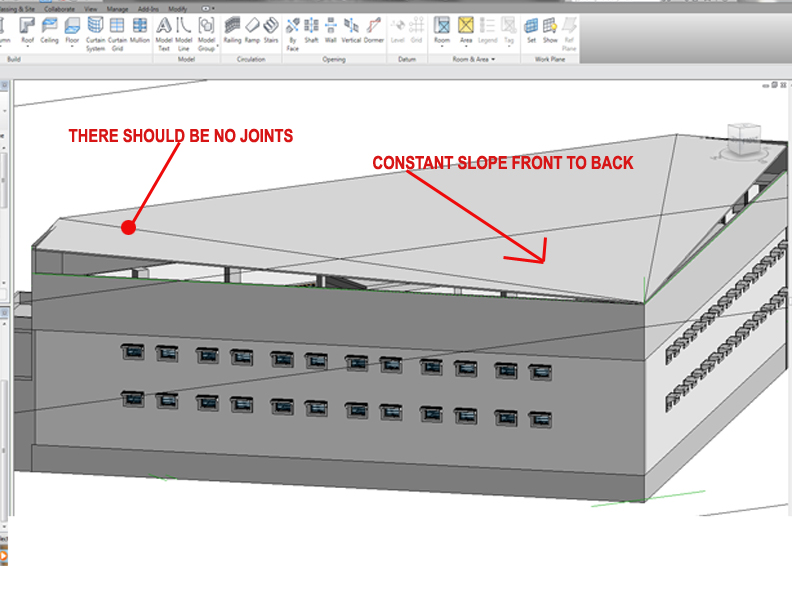
Solved Horizonzal Slope Joint Autodesk Community Revit Products
Https Encrypted Tbn0 Gstatic Com Images Q Tbn 3aand9gcqt Jag1pa Hofhz 59fqg8i0feamtfelr0xlmsrdq6chiqvxbg Usqp Cau

How To Create A Thatch Roof In Revit Micrographics

Revitcity Com How Do I Create A Roof Cricket

Revit Sloped Beam System Cadclip Youtube

Cannot Create Parts For Roof In Revit Autodesk Community Revit Products

Solved Roof Wall Join One Side Roof Misses Autodesk Community Revit Products
Creating Complex Roof In Revit Cadnotes

Revit Roof Tip 7 Use Shape Editing To Create Flat Roof Slope Youtube

3 Complex Roof Shapes In Revit Youtube
Revitcity Com Please Help Revit 2011 Creating A Single Sloped Roof

Revit Sloped Glazing Youtube
About Editing Floor And Roof Shape Revit Products 2019 Autodesk Knowledge Network

Solved Why Can T I Make This Roof Autodesk Community Revit Products

Autodesk Revit Roof Slope Arrows Youtube

Revit Tips Spanish Roof Adaptive Insane Version Revit Tutorial Autocad Revit Roof

Making A Curved Mass Surface In Revit Youtube

Several Residential Commercial Buildings As Well As Other Wood Framed Roofs Contain Clipped Gable Ends Also Know Building Information Modeling Roof Gable Roof

Solved Sloped Structural Framing Autodesk Community Revit Products

Revit Architecture Roof By Footprint Bimscape

Revit Part 1 Architecture 2010 Sloping Eyebrow Dormer Cadclip Youtube

Revit Structure Sloped Flat Roof Cadclips Youtube

Adding Dormer Window To A Sloping Roof Youtube
Split Roof In Revit Paul F Aubin

Roof Slope In 2 Directions With The Same Angle Autodesk Community Revit Products

Autodesk Revit Sloping Curved Walls Youtube
Https Encrypted Tbn0 Gstatic Com Images Q Tbn 3aand9gcqxw8we2bv5gjaapbd4szzagwda Mezdx6oi9dta K Usqp Cau
Source : pinterest.com
